How To Configure Your Google Gmail Client With A New Email Account
Adding additional email accounts to your Gmail web client is a smart way to streamline your email management and stay on top of all your communications. By consolidating multiple email accounts into a single Gmail interface, you can easily access, organize, and respond to messages from various addresses without the need to switch between different platforms.
In this article, we will detail the steps required to add a new account to your current Gmail web client.
Login To Gmail
Go to Gmail and log in to your existing Gmail account.
Access Account Settings:
Click on the gear icon in the top-right corner of the Gmail interface. This will open a dropdown menu.
Click to Enlarge
Select "See All Settings"
In the drop-down menu, select the option “see all settings”.
Click to Enlarge
Select "Accounts & Import"
In the top menu shown in the image below, select “accounts & import”.
Click to Enlarge
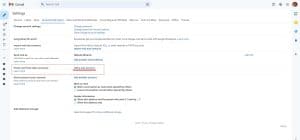
Select "Add A Mail Account"
Select the “add a mail account option as shown in the image below.
Click to Enlarge
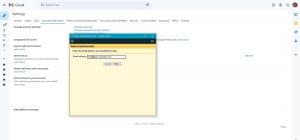
Add Your New Email Address
Enter the email address of the account you are trying to add.
Click to Enlarge
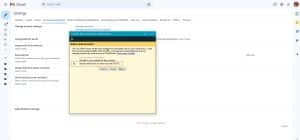
Select "Import Emails From My Other Account (POP3)"
Select option to import emails from my other POP3 account.
Click to Enlarge
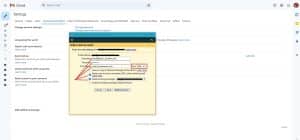
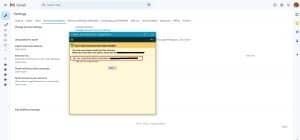
Enter Host Connection Settings
Enter the settings supplied for your new account. The user name with be your new email address that you are trying to set up. Be sure to set the port number and check the box “Always use a secure connection (SSL) when retrieving mail.”
Click to Enlarge
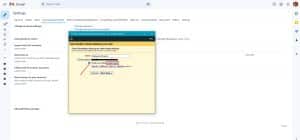
Select To Send Mail
Select the option “Yes, I want to be able to send mail as…”
Click to Enlarge
Setup Name & Alias
Enter the desired name you want emails send from this account to show as and check the box “Treat as an alias.”
Click to Enlarge
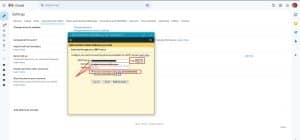
Configure Sending Settings
Set all SMTP settings using the supplied server, user name (email address), and password. Be sure to set the correct SMTP port. This will be different from the POP3. Check the box “Secured connection using SSL”
Click to Enlarge
Check and Confirm the New Account
Gmail will send an email message to your newly added account asking you to click a link and grant sending rights. Be sure to complete this request by clicking the link found within the email.
Gmail’s ability to integrate multiple email accounts into one streamlined interface offers significant advantages for businesses. By consolidating various email addresses into a single Gmail account, businesses can efficiently manage communications, stay organized, and reduce the hassle of juggling multiple platforms. This centralized approach enhances productivity, as users can easily access, sort, and respond to emails from different addresses without disruption.
How To Configure Your Google Gmail Client With A New Email Account
Adding additional email accounts to your Gmail web client is a smart way to streamline your email management and stay on top of all your communications. By consolidating multiple email accounts into a single Gmail interface, you can easily access, organize, and respond to messages from various addresses without the need to switch between different platforms.
In this article, we will detail the steps required to add a new account to your current Gmail web client.
Login To Gmail
Go to Gmail and log in to your existing Gmail account.
Access Account Settings:
Click on the gear icon in the top-right corner of the Gmail interface. This will open a dropdown menu.
Click to Enlarge
Select "See All Settings"
In the drop-down menu, select the option “see all settings”.
Click to Enlarge
Select "Accounts & Import"
In the top menu shown in the image below, select “accounts & import”.
Click to Enlarge
Select "Add A Mail Account"
Select the “add a mail account option as shown in the image below.
Click to Enlarge
Add Your New Email Address
Enter the email address of the account you are trying to add.
Click to Enlarge
Select "Import Emails From My Other Account (POP3)"
Select option to import emails from my other POP3 account.
Click to Enlarge
Enter Host Connection Settings
Enter the settings supplied for your new account. The user name with be your new email address that you are trying to set up. Be sure to set the port number and check the box “Always use a secure connection (SSL) when retrieving mail.”
Click to Enlarge
Select To Send Mail
Select the option “Yes, I want to be able to send mail as…”
Click to Enlarge
Setup Name & Alias
Enter the desired name you want emails send from this account to show as and check the box “Treat as an alias.”
Click to Enlarge
Configure Sending Settings
Set all SMTP settings using the supplied server, user name (email address), and password. Be sure to set the correct SMTP port. This will be different from the POP3. Check the box “Secured connection using SSL”
Click to Enlarge
Check and Confirm the New Account
Gmail will send an email message to your newly added account asking you to click a link and grant sending rights. Be sure to complete this request by clicking the link found within the email.
Request Information on how we can help you grow your business with a free consultation today.
In Conclusion
Gmail’s ability to integrate multiple email accounts into one streamlined interface offers significant advantages for businesses. By consolidating various email addresses into a single Gmail account, businesses can efficiently manage communications, stay organized, and reduce the hassle of juggling multiple platforms. This centralized approach enhances productivity, as users can easily access, sort, and respond to emails from different addresses without disruption.
Our Services
Profile Optimizations
Creative Support
Recent Posts
Setting Up A New Email With Gmail
July 23, 2024The Power of Genuine Reviews: Building Business
July 3, 2024Importance of Establishing Quality Backlinks for Your
March 24, 2024